Ceramics pinch pot Ideas
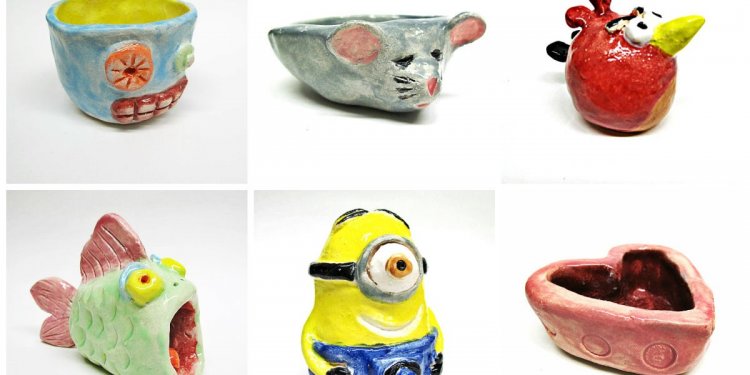
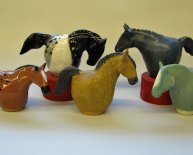
 The whimsical and charismatic ceramics of Alison Smiles playfully combine the useful and the sculptural. This wonderful artist also happens to be my cousin, and creativity runs in the family. Alison paints, scribbles and scratches her hybrid creatures into existence, discovering their personalities as they emerge. After graduating from the University of South Australia in 2011, she received an Arts SA funded mentorship with Melbourne-based ceramicist Vipoo Srivilasa. The following year she became an associate at the Jam Factory, where she met the co-founders of her current studio and retail space, 6 Hands Studio. Alison and her friends now create and sell their work at 6 Hands, located on Rosetta St in West Croydon. In 2015 she travelled to Korea and spent five weeks participating in a mentorship and cultural exchange program, culminating in the exhibition, ‘Beyond Limitations’, shown at the Clayarch Museum in Gimhae. Her artwork can be found in public and private collections locally and internationally. Find her on Instagram: alison_smiles_ceramics.
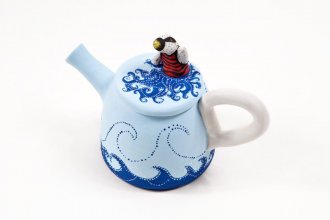
 This is one of her amazing sculptures, of our whistling grandmother (with the red hair) who was also a very creative woman and we miss her dearly.
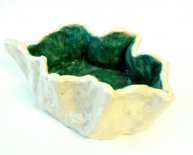
In my new book, (which you can grab here!), Alison shares how to make a simple clay pinch pot, which is a super easy and fun project to do. You can make this pinch pot out of any type of clay. In these step-by-step images, she is using a beautiful Australian porcelain, but strong gritty clays such as Raku clay also work really well. These clays all involve two firing processes in a kiln, but if you don’t have access to a kiln, it’s fine. All you need to do is purchase an air-dry clay from an art supply store and follow the same process.
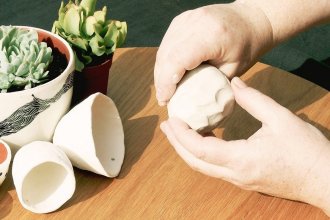
Step 1:
Grab a ball of clay and divide it into small-sized balls. Remember that you will be creating a void in this lump of clay, so it needs to be significantly smaller than the pinch pot you want to create.
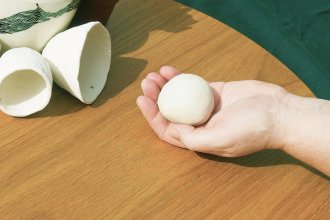
Step 2:
After rolling the clay into a vague, egg-like shape, firmly poke a hole into the centre, while supporting the form by cradling the clay in the palm of your hand. This is the beginning of the vessel.
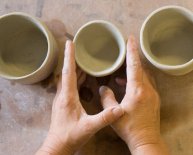
 Step 3:
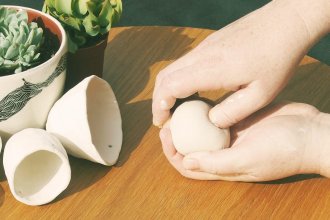
By pressing the clay between your finger and thumb, enlarge the void in the pinch pot by displacing the clay with your pinching. It’s really important to note here that there is a little bit of technique involved: you need to work on the base of the pot first, so that the opening remains small. If you open up the pot straight away, the shape will become a bit floppy and may flatten out more like a wilted tulip than an egg shape! This is important, particularly if you are using proper clay and firing in a kiln, as the heat may distort the shape of a weak pot and you may end up with a lot of warping of the final shape.
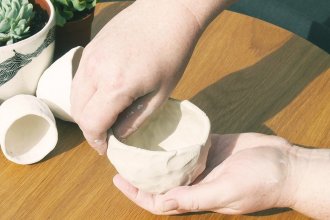
Step 4:
As you have worked the clay between your fingers, you can start opening up the form to reveal the clay as a vessel. You can then encourage a shape of your choice, either an open bowl shape, or more egg-like.
Step 5:
Work around the whole shape, finessing the form a little more, paying attention to the rim of the vessel so it becomes a slightly more controlled shape, while keeping the lovely organic texture of the hand-built form.
Step 6:
You may have some surface cracks, depending on the type of clay you are using. Gently tease these away by running a wet finger along the surface. Avoid using too much water though, as it weakens the clay and it could collapse. If you’re planning on making a hanging pot, then you might want to make some holes to thread some string through. Or handles. Or drainage holes. Or textures by pressing stamps in. It’s really up to you and what you are using it for!
Step 7:
Finish your pot off by painting it. If you are using air-dry clay, use an acrylic paint and finish with either a spray sealer or water-based varnish. If you are using a regular clay, use an underglaze stain from a ceramic supplier. The pot can then be bisque-fired in a kiln, and later glazed and fired again to set the glaze.

Share this article
Related Posts
Latest Posts


