How to make clay vases by hand?
 Clay vases have been around for centuries. In ancient times, people would use clay pots for storing water and food, as well as displaying them as beautiful art objects. This water-resistant material has long made it a popular choice for vases, as well, so that flower vases can hold water without damaging the integrity of the vase. Today, it's easy to buy vases from stores or artisans, but it can also be fun to make them on your own. Pottery like this is easy to make if you have the right tools, and the experience can provide plenty of joy and creative exercise for anyone who wishes to give it a try. Here are some tips for making a homemade clay vase.
Getting Started
The first thing to think about before making a clay vase is how to prepare. Like any art project, there can be some mess involved, so make sure to wear clothes that you don't mind getting dirty or wear an apron of some sort. Likewise, make sure you are working in an area that is well-protected so that you don't damage anything. Many people make clay vases in studios that are dedicated to such projects.
Get the Clay Ready
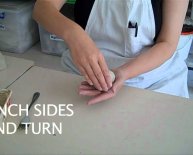
Before you jump into making the shape of the vase, you have to prep the clay to get it ready. The best way to do this is to take about a half-pound of clay and knead it with your hands. Just rub it firmly against a flat surface using your palms and knuckles to dig into the clay and get rid of air bubbles and soft spots. This process will make it more pliable and easier to manipulate. Just make sure not to fold or damage the clay by adding air to it because this will make it react badly in the oven. Once you're done kneading it, use a stiff wire or floss to slice it in half and check the surfaces - you'll be able to see if any bubbles or gas remain in it.
Prepare the Wheel
Using a pottery wheel is the best way to make a clay vase. You can purchase one or go to a studio to use one. To get started, smack the clay in your hands by throwing it firmly between your palms and smacking it into a ball. Make sure the wheel is completely dry so that the clay can stick to the surface, but keep a bucket of water to the side where you can wet your hands to form the shape of the clay. Smack the clay down in the center of the wheel and form it into a cone.
Turn on the Wheel
Now for the fun part! Turn on the wheel and let it start spinning rapidly. It will build up speed, and as it does you can wet the clay and use your hands on either side of the cone to shape it into a round tower. Make sure to keep a firm hold on the clay so that it doesn't fly off the wheel. Wet your hands every few minutes as you keep working it into shape.
Create the Shape of the Vase
Once the mass of clay is beginning to grow in height, stick your thumb down into the center, almost down to the wheel itself, but without pushing through the clay. Use the rest of your fingers to make this hole wider and wider until the neck of the vase is the size you want. Use your palms to pull the vase up until it's as tall as you'd like. Then gently spread out the top to make it a bit wider in the shape of the vase that you want. Turn off the wheel and remove the pot from it.
Fire the Vase
Now it's time to fire the vase. As this is a tricky task that requires more advanced equipment and can be dangerous, it's best to work with a skilled expert or to follow the manufacturer's instructions. Then you can decorate your vase with paints and other accessories in order to make a beautiful piece of art!


