Ceramic Things to make
I often get asked, “I want to start doing ceramics, what do I need?” This week I will talk about the many types of ceramics and how one may get involved in them. If you are already an expert, maybe there is someone you know who is interested in ceramics and you could forward this to them for an overall introduction. If you are already engaged in one form, you may learn what is required to try another form, and what the pros and cons of each are.
- Decorating Already Made Ceramic Pieces
Bisque painting with paints. You can buy bisque pieces, and paint them with acrylic paints and sealer. This will not hold up to functional use as dinnerware, but is fine for decorative pieces. This would make the most sense for someone who can paint intricate designs, or wants to practice such. It takes very little investment, just the bisque pieces, some paints, and a brush. There are books with designs that you can copy if you need inspiration. And every issue of Popular Ceramics magazine has projects for painting.
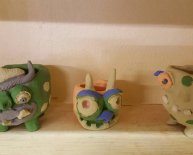
Bisque painting with ceramic glazes. This is one step up in terms of investment and quality of the finished items. The ceramic glazes will be fired, and thus permanent. But that means you need access to a ceramic kiln. One place to check is with contemporary ceramics studios. Often they will fire your own pieces for a fee. Another is to check the ceramic Kiln Timesharing listings at BigCeramicStore.com. There may be a potter in your area who will sell you space in their ceramic kiln. Another approach would be to enroll in a community class that has a ceramic kiln. And finally, you can buy your own ceramic kiln. A small ceramic kiln can be had for only a few hundred dollars, and is much more convenient that trying to find space elsewhere. You also have the benefit of total control over the process, so someone else doesn’t smudge your design, or drop your piece, for example. These small ceramic kilns plug into normal household power, and if you upgrade to a larger ceramic kiln later they can be used as test kilns to test glazes.
- Making Your Own Pieces
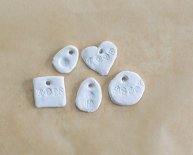
Oven bake, air dry, or polymer clay. These also do not require use of a ceramic kiln. They either air dry or are baked in a standard oven. Due to expense, they are best used for small items such as jewelry, ornaments, etc. The oven and air dry clays are similar in look and feel to normal clay. Polymer clay comes in many bright colors (kind of like playdo!), and can be made into beautiful designs which become plastic-like when fired.
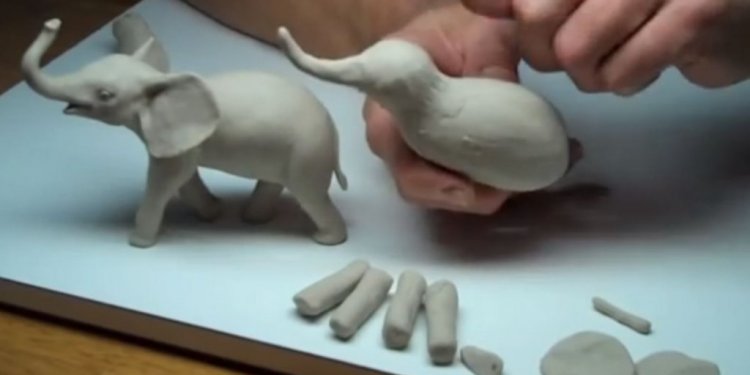
Handbuilding with standard clay. The possibilities are endless for handbuilt ceramics. It requires the use of a ceramic kiln (see above). But otherwise the investment needed is very low. Clay itself is inexpensive. ($6-10 per 25 lb bag) A rolling pin, newspapers or cloth, and other ordinary household items are all that are required. With a book on handbuilding, most anyone should be able to start making pieces on their own.
Pottery wheel throwing with standard clay. Again, a ceramic kiln is required. And once you are an experienced thrower you will undoubtedly want a large ceramic kiln, since you will produce pieces much more quickly than in handbuilding. However, at the beginning I would recommend joining a class if at all possible. You can learn to throw from books or even better, videotapes, and some people do. But it is difficult. It takes a while to get the knack for throwing, and can therefore get frustrating unless you have interaction with an instructor and see other students struggling as you are. I think most people with no experience, buying a pottery wheel and trying it out on their own, would get frustrated and give up. A class will offer you instruction, a ceramic kiln, and ceramic glazes so you don’t have to worry about that quite yet. Your only investment will be the cost of the pottery class, and perhaps some materials costs such as clay and a basic tool set for under $20. At some point you may find that you don’t like to be constrained by the hours of the pottery class, that you want complete control over your work (so someone else doesn’t smudge the glaze, break, damage or steal your ceramic pieces), or that you want to do things beyond the capability of our class studio. At this point I would recommend getting your own pottery wheel, and ceramic kiln unless you have access to someone else’s kiln. However, if you are patient, you could continue to build your pottery throwing skills, never firing anything but instead recycling the clay to be thrown again. It is tempting to want to finish each piece at the beginning, because you are very proud of it, but soon you will hate the look of those early pieces! so not even firing them at all would be a fine strategy. While you are in the intermediate stage, assuming you are firing your work, I would recommend a clay extruder. The reason is that you can make use of the hundreds of small cylinders you will throw, by putting nice handles on them and making mugs. Otherwise practice making hand pulled handles (shown in most pottery technique books.)
Slipcasting. In this case you buy or make plaster molds, into which you pour liquid clay (slip.) The slip coats the inside of the mold, so when it hardens and you pull the mold away, a cast piece remains ready to decorate and fire. It would seem like if you poured slip into a mold, you would get a solid chunk of clay. But the slip only sticks to the inside surface of the mold at a certain thickness. You pour out the rest of the slip. When the piece dries it shrinks and separates from the plaster leaving you with a hollow piece.
- Low Fire or High Fire
At some point you will decide to use low fire or high fire techniques, or like me, to combine them. Often it will depend on where you got started and what they used. Most popular ceramics studios low fire clay, and most colleges high fire clay. Low fire is usually cone 06-04 (see chart), whereas High Fire (or some call Mid to High Fire) is cone 5-10. The difference between them is the temperature at which the clay matures “fuses” and glazes “melt”. For more technical details, see the information sections on the site.
Low fire is usually best for bright colors, and detailed decoration. The ceramic glazes are very stable at that temperature, the colors stay bright and they don’t move during firing. The drawback is that the pieces are not fully vitrified (the clay isn’t fully fused) so you are counting on the glaze to make the piece waterproof. This makes them less suitable to dinnerware or items holding water. The glaze is more likely to chip because it hasn’t interacted with the clay as in high fire. However, if the proper clay and glaze are used, it can be quite strong. The clay used for low fire is called Earthenware.
Mid to High fire uses clays that are called Stoneware or Porcelain. Bright colors can still be gotten in oxidation kilns (electric kilns), less so in reduction kilns (gas kilns). Pieces are very strong, when fired to temperature the clay is waterproof on it’s own, and can be used for dinnerware and ovenware. Porcelain can be made very thin and still maintain strength. Glazes at these temperatures interact with the clay bodies giving speckled, individualized pieces that people many find interesting. The ceramic glaze typically moves (a lot or a little) so detailed designs would get blurred.
- Ceramic Glazes
Liquid: You can purchase commercial ceramic glazes and underglazes in liquid form which are usually formulated for brushing. All you need to apply the ceramic glaze is a brush. Some ceramic glazes are difficult to brush on smoothly, you will see brush marks. Others will melt enough to erase the brush marks.


