How to make ceramic plates?
Ask any mother or grandmother around what are the best gifts they have ever received. Their reply will most likely be those gifts that were homemade and from the heart. These gifts carry so much meaning and can be treasured throughout the years. If you are looking for a sweet and unique homemade gift idea, try making handprint art on any kind of ceramic dish. Preserving your child's handprint is a wonderful way to remind you and others just how small your kids used to be.
Wanting to do something special for both grandmas for Mother's Day, my boys and I went to work making handprint art on two ceramic platters that I had purchased. They turned out really cute. Refer to the table to the right for cute decorating ideas for each special occasion. If you would like to recreate our "Mimi's Garden" handprinted platter, read further for a list of supplies and step-by-step directions for making this craft.
What Kind of Paint to Use on Ceramic Dishes?
You may be wondering what kind of paint to use on your ceramic dishes. I suggest choosing an enamel acrylic paint which is specially formulated for use on both ceramics and glass. We used the Folk Art brand of enamel paint on our platters. This kind of paint is a little more expensive than your standard acrylic paint, but it is more durable and scratch resistant. You also can wash these dishes on the top shelf of your dishwasher once they are dried and cured in the oven.
If you are planning on using these dishes around food, you need to make sure your ceramic paint states toxic-free and safe to use around food. Some ceramic paints contain harmful ingredients that should never be used near food. If you are handpainting a ceramic dish for home décor, you do not have to worry about the toxic-free label.
How to Paint
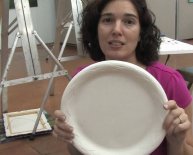
To get started making handprint art on a ceramic dish, you will first need to gather all the necessary supplies and decide what kind of dish you are going to paint. Be sure the dish has been thoroughly washed and dried. You also need to wipe it down with alcohol and a paper towel to remove any hidden residue.
Before attempting to make the handprints, make sure to wash your child's hand. Dirt and oil from his or her hand could potentially affect the quality of the paint. Below are the supplies you will need and step-by-step directions for painting your ceramic platter.
Supplies:
- Ceramic serving platter
- Ceramic paint - green, blue, yellow, red, and purple
- Ceramic paint markers - black and white
- Letter stencils (optional)
- Paintbrushes
- Alcohol
- Paper towels
Directions:
- Wash and dry ceramic dish. Wipe down dish with alcohol and a paper towel to remove any residue.
- After washing your child's hand, use paintbrush to cover the hand completely with desired color of ceramic paint.
- Press child's hand firmly down on the platter. The gloss on the ceramic platter makes it slippery but try to keep the hand from moving.
- Carefully lift up your child's hand. If satisfied with the print, move on to the next color of handprint flower. If you wish to start over, quickly wash platter with warm water or use alcohol to help remove paint.
- Once you have completed the handprint flowers, paint stems and leaves to bottom of the prints. Add grass to bottom of platter.
- Use a black ceramic paint marker to write "(insert name here)'s Garden" up above the flowers. You can also use letter stencils to help with this if you do not wish to free hand the title.
- To make the butterflies, cover your child's index finger with black ceramic paint and press firmly to platter. Once dry, add colorful wings, antennas to head, and cute faces to the butterflies.
- To make either the ladybug or bumblebee, use red or yellow ceramic paint to cover the tip of your child's thumb and press firmly to platter. Once dry, add black dots or stripes, antennas, legs or stinger, and cute bug faces. I used the black ceramic marker to decorate these bugs.
- Once satisfied with the design, set platter on baking pan. Place in oven and bake for 30 minutes on 300 degrees. Do NOT preheat the oven. Let the platter gradually warm with the oven to prevent cracking or shattering.
- Carefully take the pan out of the oven and set aside in a safe area to allow the platter to completely cool.
Fun Art Projects for Kids
This handprint art platter is a really fun art project for parents to make with their kids. Keep in mind that it will take some practice to perfect the handprints. Several of our handprints did not turn out so well, but we just washed or wiped away the print and started again. A good idea would be to practice on paper before applying the handprints to the platter. Also remember this craft could get messy, so be sure to protect your table with newspaper or crafting tablecloth to prevent paint from getting all over the place.
So the next time you need a sweet and unique homemade gift idea for a loved one, try making handprint art on a ceramic dish. This is one gift that will truly be treasured for many years to come and serves as a wonderful reminder of just how small your child once was.
I hope you have found this guide helpful to creating handprint art on ceramic dishes. If you have any comments or questions about this art project, feel free to leave these in the comment section below. Happy crafting!


